
A couple of weeks ago I lent my WHFB Ogre Kingdoms army to a local player who was involved in an updated Warhammer Fantasy tournament.
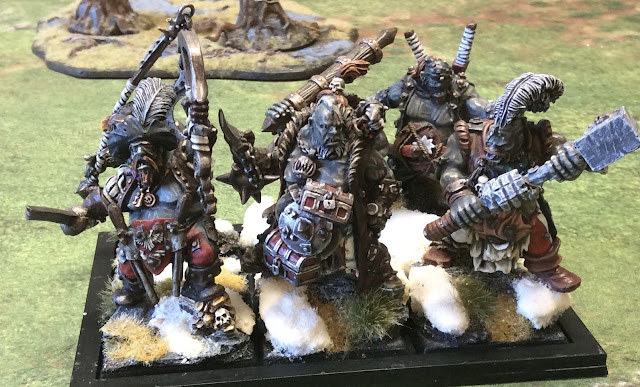
Citadel Maneaters repurposed as Siegebreakers
After getting it out I thought how easy would it be to port into KoW. So last week I racked up the models in movement trays and "voila" a new army to play.
Lliam brought along his FotA (some small changes after his fight with my Varangur) and we rolled up "Pillage" with five objectives. Three of these were placed in the corners with two in the middle.
In the photo below is the Ogre deployment. From the top - Boomers, Rabble, Siegebreakers. In the centre, Warriors, Chariots, BSB behind, Lord in Chariot, more Siegebreakers, a Warlock and more Warriors. Out of shot are two more Rabble blocks.
Importantly, Rabble blocks are on objective markers in each corner near my baseline.
Importantly, Rabble blocks are on objective markers in each corner near my baseline.

Lliam's deployment is captured in the next photo. In the bottom right you can see some Tortured Souls just peeking into the shot. The centre has Lower Abyssals, Chroneas, Warlock and Succubi. Behind is a unit of Gargoyles. He has stacked the far flank with more Tortured Souls, more Succubi, Well of Souls, more Gargoyles, Temptress and Abyssal Horsemen.

The Abyss forward aggressively on the stacked flank. They were however hampered by the wood which meant they hit my lines in a piecemeal fashion. The Well went into the Boomers while the Gargoyles chaffed up the Siegebreakers.

In the centre, more of the same. The Tortured Souls jump the Ogre lines while the Gargoyles get in the way of the Chariots (who have Caterpillar). The Ogre eyes are gleaming somewhat as the Lower Abyssal Horde is now in charge range. In the top of the picture you can see the other Objective marker which a regiment of Rabble are now making a run for.

Two Ogre Hordes plus the Chariot Lord go into the Abyssals removing them. The Lord and Siegebreakers turn to face the Chroneas.

This has left the Abyssals very light in the centre and the on their left.

Back on the Abyssal right, the Boomers have retreated and the Rabble charged the Well, doing....well nothing. Their flank is exposed to a hindered Abyssal Horsemen charge next turn. However their sacrifice may buy some time. The Siegebreakers have routed the Gargoyles but are set to be charged by Succubi with the "Always wound on 4+ hammer".

The centre Succubi charge the Chariots while the Chroneas lines up against the Chariot Lord. Out of shot the Tortured Souls turn 180 degrees.

The Well and Horsemen remove the Rabble while the Succubi rout the Siegebreakers. The order of combats has seen the Succubi expose their rear to the Boomers who can pivot and make contact.

The BSB joins in on the fun while the Warriors eventually prevail in a protracted combat versus the Tortured Souls.

In the centre the Tortured Souls charge the rear of the Chariot Lord while the Chroneas countercharges the Siegebreakers. The Chariot Lord holds on low numbers but will disappear next turn, while the Siegebreakers see off the Chroneas second time around.
The Temptress removes the Chariots inflicting the necessary wound for a Nerve Test.
At this stage the Ogres are holding four objectives and contesting one.
The Temptress removes the Chariots inflicting the necessary wound for a Nerve Test.
At this stage the Ogres are holding four objectives and contesting one.

The contested objective is here. The Abyssal Horsemen go into the Boomers who now have 14 wounds but hold on "Snake Eyes".

This allows them to countercharge with the Warriors in support.

Final Thoughts
After the game we talked through what we saw as the key determinants. We agreed that, in retrospect, Lliam probably had stacked his right flank too heavily - especially with only one objective on that flank. This was compounded by the wood midtable on the flank. It inhabited both his visibility as he had to stop at the edge and then was put in a situation where charges were Hindered. All goes away with Caterpillar on the Horsemen.
The other critical point was the move forward with the Lower Abyssals. They were sufficiently forward that I could multicharge thenm and remove in a single turn. This gave me superiority in the centre AND left my Rabble on the flank with two objectives unbothered (as Lliam had to redirect to shore up his forces).
Good game. Nice to use a new army. Though I only had 12 drops, I had US of 27 which was important in "Pillage".
I learnt that a Ogre Warlork only has two attacks which is sub-optimal when you need to cause a wound 😉
I'm also continuing to struggle versus Flyers and haven't worked out a way to stop the winged Temptress with the Gnome Shield. Well, I think I know what to do....but I haven't done it yet.
Next out for me will likely be Kingdoms of Men.
No comments:
Post a Comment